
Workshop No. 2
 Installation stepper, chassis and pointer
This page shows the installation of a chassis, stepper driver and a pointer into a DIY instrument panel. The installation into a Scale Avionics instrument case is identical.
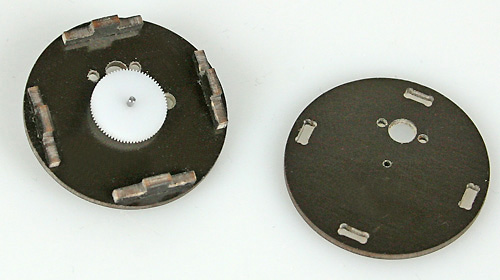 1. Chassis assembly
At first please insert the gear with the 1 mm axis and the four spacers. Close the chassis with the second disc. Gluing the parts is not recommended.
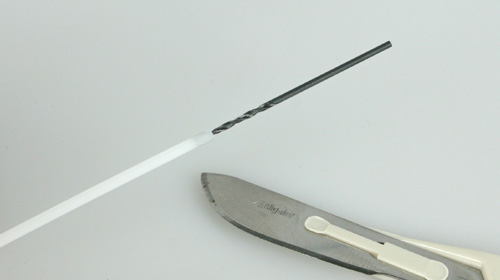
2. Pointer adapter
To fix the pointer at the end of the 1 mm steel axis a small adapter is needed. Please use a 1 mm drill by hand to expand the plastic tubes bore.
Insert a 1 mm wire and cut off a max. 2 mm long piece as pointer adapter.
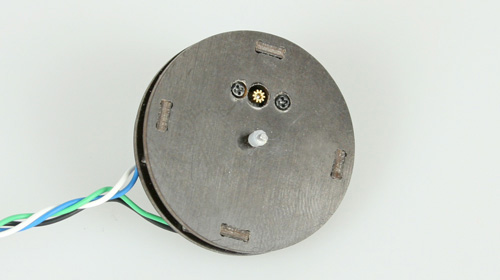
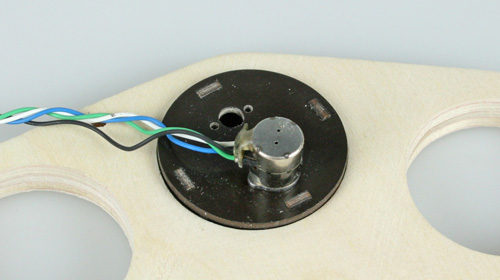
3. Mounting the stepper
The stepper is to be bold with two small screws. The chassis is also held together by them. But their heads must be flush mounted. Please also take care that the chassis plates do not deform. Please tighten the screws very slightly.
Now slide on the cutted adapter at the end of the axis (without glue!). Take care that the adapter doesn`t scrub the chassis.
4. Chassis installation
Now insert the chassis from the backside into the instrument back panel. Use a spacer ring and a glass plate to adjust the chassis. The glass plates must be flush mounted.
5. Fixing the chassis
You can fix the chassis with two small drops of hot glue. You also can fix the wires with. Hot glue has the big advantage to be removeable even if you want.
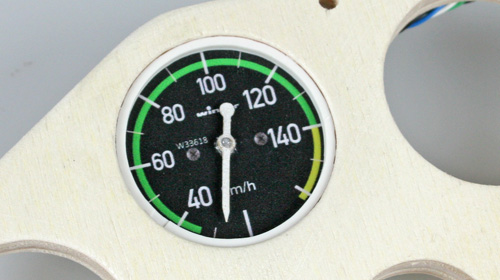
6. Fitting the pointer
After painting the pointers fix them with a micro drop of medium superglue. In order not to damage the dials just add a small drop of super glue in the eye of the pointer.
7. Finishing
To finish the work install the front panel and insert the instrument rings. If you previously glue the instrument rings into the front panel you dont have any issues with glue on the glass plates.